
WordPress website setup tutorial
This WordPress website setup tutorial will certainly come in handy now since you already have your own domain name and also a hosting plan.
If you have yet to do so, I highly recommend you to get your domain name and also your hosting plan first.
The reason for that is because the self-hosted WordPress site requires you to have your own domain name and also your own hosting plan.
Don’t get yourself confused with WordPress.com. It’s still WordPress in the technical sense.
But WordPress.com doesn’t require you to have your own hosting plan. You can still buy a domain name just like the self-hosted WordPress. But you can’t do much with the customization unless you opt for the premium plan.
In all honesty, you may as well opt for the self-hosted WordPress since you have the freedom to create all sorts of websites with WordPress.
For this WordPress website setup tutorial, I’ll be using Namecheap for the domain registrar and HostGator for the hosting plan.
You can use other domain registrars and web hosting services if you’d like. The process for setting up a WordPress site should be more or less the same.
WordPress website setup tutorial for beginners
Before we begin with the WordPress website setup tutorial, be sure to have the email that you got from your web hosting service with you.
The reason for that is that it contains vital information such as your nameserver, your login credentials, and also the link to access your cPanel.
Now that you already have this information with you, it’s time for you to begin with the first part of the setup.
And that is setting up your domain name to point to your server.
Setting up a domain name to host
Since we’ll be pointing the domain name to another host, that means we will have to override the default setting.
In order to do that, we need to change the setting on our domain name to a custom host.
Namecheap has a tutorial on how you can set up your domain name to connect to another hosting service. So, take a look at the tutorial right here to begin with the setup.
Once you already completed the setting, you need to wait for a little bit for the domain name to propagate after the nameserver change.
It doesn’t take that long for the domain name to propagate. But to be on the safe side, it’s better for you to wait for 24-48 hours for the change to take effect.
Installing WordPress on your server
Once your domain name is already propagating to your current hosting, you can now log in to your cPanel and start installing WordPress.
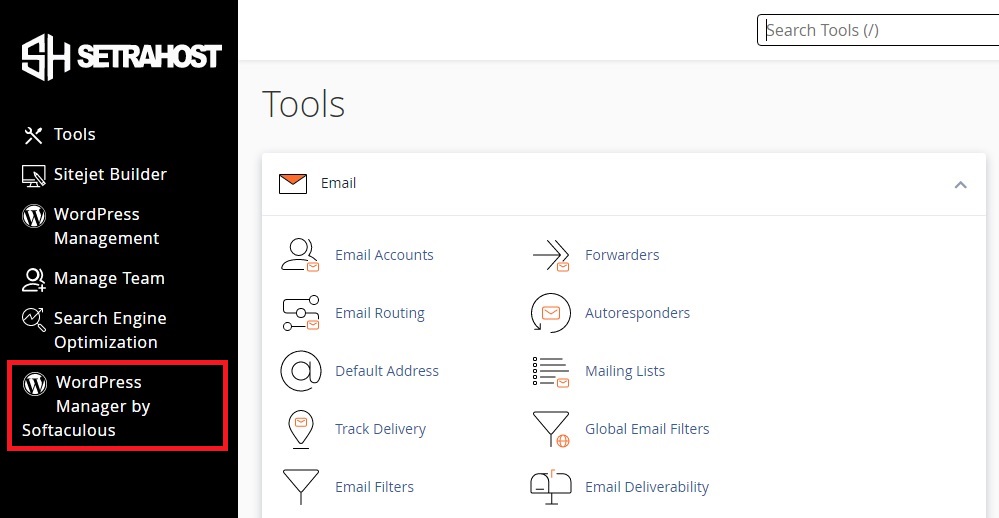
If you’re using Setrahost, click on WordPress Manager by Softaculous to begin the installation.
It will then lead you to the WordPress Management page. Click the Install button to begin the installation.
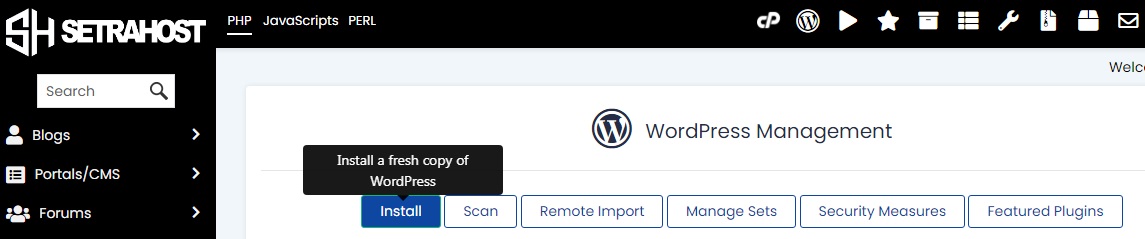
When you click the Install button, it will lead you to the page that allows you to configure your brand-new WordPress site.
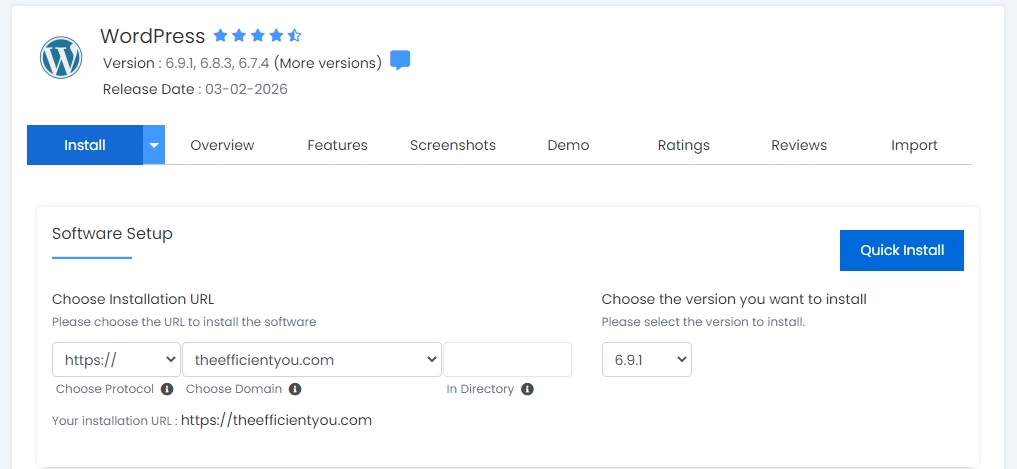
Remember the domain name that you’ve purchased earlier?
This is where you select your domain name for the installation URL.
And don’t forget to change the protocol to https://.
As for the version you want to install, it will usually display the latest WordPress version.
So, install the latest stable version available. The installer will automatically select this for you if you’re not sure which version to install.
You can then proceed with the Site Settings and Admin Account.
Remember that the username, password, and email you set in the Admin account will be the same ones you use to log in to your WordPress site.
So, don’t forget your login credentials. Write them or save them somewhere if you must.
As for the plugins and themes, we’ll do that later, since you can do all that within your WordPress dashboard.
The advanced option
Some people say that they hate auto-upgrade, considering there’s a big chance that the new update will break their WordPress site.
So, should you follow this crowd or should you just enable the auto-upgrade to save your sanity?
Personally, I have no issues with enabling the auto-upgrade.
If you don’t have the bandwidth to keep your WordPress site up-to-date, then just enable the auto-upgrade, especially when you only log in to your WordPress site sporadically.
Even if you don’t, it’s convenient to have your WordPress core, theme, and plugins updated automatically without you having to mess around with them.
Creating an email account dedicated to your author website
Have you always wondered how someone can have an email address with their website name on it?
Well, the good news is that you can do the same, too. You can create as many email accounts as you want straight from your cPanel.
The process for creating email accounts for your author website is simple, too, since it’s not that much different from signing up with Gmail or Yahoo! Mail.
To begin with creating the email accounts for your author website, log in to your cPanel again and click on Email Accounts.

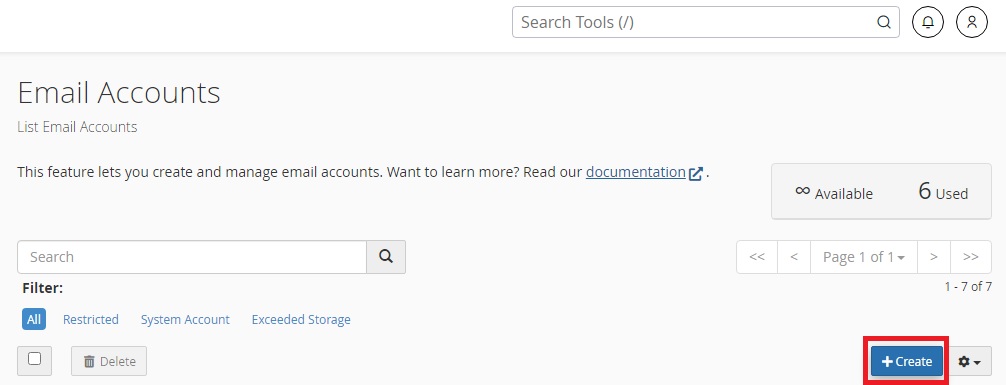
When you do, it will lead you to the page to create the email accounts.
Just click on the Create button to get started.
The process is rather straightforward, which shouldn’t be much of a problem for you. But if you still struggle with the process, you can take a look at the tutorial right here.
What email account should you create?
While it’s true that you can create as many email accounts as you want in your cPanel, it’s pointless to do that if you have no way of tracking the incoming mail.
If that’s the case, then what type of email account should you create?
When it comes to what email accounts you should create, it still depends on how you plan to communicate using email.
But if you’re still not sure what email accounts you should create, here are my suggested email accounts.
Email account used to communicate with other professionals
This email is solely for you to communicate with other professionals, such as your editor, book cover designer, etc. You can also use this email to communicate with other authors in your genre and industry, too.
If you’re thinking of signing up with a professional service, you can also use this email as well.
You can name this email account using any appropriate name. Just be sure to let people know that this is the email address that you use for work.
I also have an email account dedicated to this purpose on The Efficient You and also on my fiction author site, Sekina Mayu.
Email account dedicated to communicating with your readers
You can say that this email account is for receiving your fanmail.
I don’t have a dedicated email for readers on The Efficient You since I don’t write a lot of books under my real name. But I do have a dedicated email account for readers on my fiction author site.
Accessing your email accounts
Now that you already created email accounts dedicated to your author website, how do you access the email accounts?
Well, there are two ways for you to do that. And that is through a webmail and also through an email client.
Using a webmail
Accessing your email accounts through a webmail is the same as accessing your Gmail or Yahoo! Mail account.
All you need to do is log in to your cPanel and click Email Accounts.
From there, you will see all of the email accounts you already created.
To open the webmail, click Check Email, and you can access the email in a new tab.
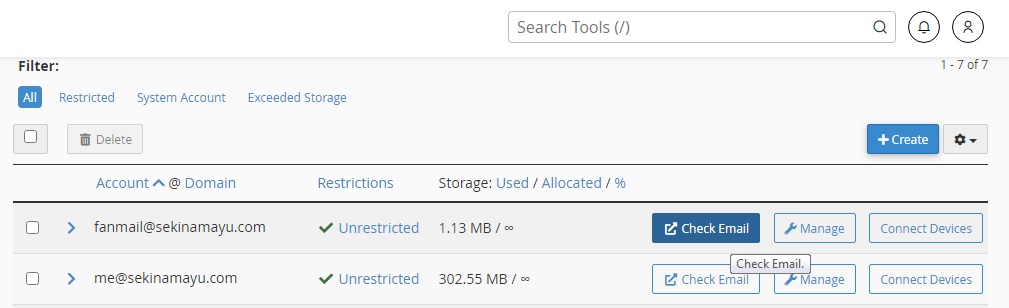
You can also do the same for other email accounts as well.
Using an email client
This is my preferred method to access email accounts since you don’t have to log in to your cPanel every time you want to check your email.
Using an email client will also make it easier for you to check all your email accounts at once.
If you have a Gmail account or any other free email account service, you can also set your email client to retrieve emails from those accounts as well.
Setting up an email client to access your email accounts
There are quite a few email clients you can use to access your email accounts. One of them is Microsoft Outlook. You can also use Mac Mail to access your email accounts.
But if you don’t have Microsoft Outlook and Mac Mail, you can use Mozilla Thunderbird instead.
What I love about Mozilla Thunderbird is that it’s free. And it’s also easy to do the email configuration on Mozilla Thunderbird.
If you’d like to use Mozilla Thunderbird as your email client, you can download it right here:
Once you already downloaded Mozilla Thunderbird, you can now begin with the email configuration.
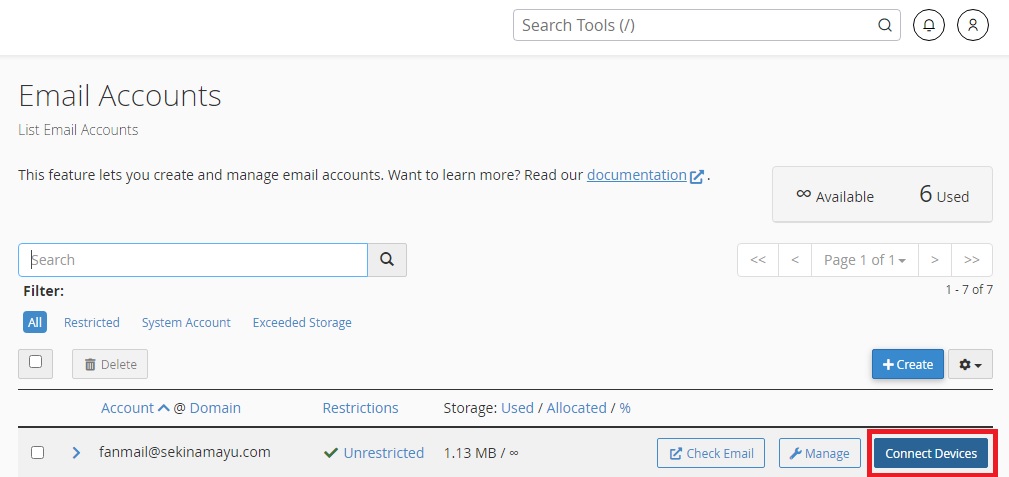
Prefer to use a different email client? You can click the Connect Device button for details on the configuration for your email client.
We’re almost there
Configuring your domain name, installing WordPress on your server and setting up your email accounts and email client are only just the beginning.
After all, your author website is far from done. And it’s obviously not ready for its primetime yet.
The good news is you can do all the next few parts straight from your WordPress dashboard.
That’s a good thing since you no longer have to do anything that involves cPanel.
If you manage to complete all these things already, you should give yourself a pat on the back and go treat yourself something nice. You deserve this after all the things that you have to go through.
The ‘TL;DR’ (Too Long; Didn’t Read) Section
Your quick answers to all your WordPress site setup woes, even the technical ones. They all sum up in an easy-to-view toggle format.
Do I need a domain and hosting before installing WordPress?
Yes, a self-hosted WordPress site requires you to have your own domain name and hosting plan. You should not confuse this with WordPress.com; opting for a self-hosted site gives you the freedom to create and customize your author website exactly how you want without the limitations of a hosted platform.
How do I point my domain name to Setrahost?
Since you are likely using a separate registrar like Namecheap, you must point your domain to your host by overriding the default nameserver settings. You will need to change your domain’s nameservers to the ones provided in your Setrahost welcome email; once completed, you should wait 24–48 hours for the domain name to propagate across the internet.
Alternatively, you can use a site like ‘What’s My DNS?’ to check if your propagation is finished, so you don’t have to keep refreshing your browser.
How do I install WordPress using Setrahost?
Once your domain has propagated, log in to your Setrahost cPanel and look for the WordPress Manager by Softaculous on the sidebar.
The process is straightforward: choose your domain, enter your site name and admin credentials, and click install. This allows you to set up your site without any technical coding background.
Why should I create a professional email address for my author brand?
Having an email address with your website name (e.g., name@yourwebsite.com) not only builds trust with professionals and readers. But email marketing platforms such as Mailerlite requires the emails to be sent from a trusted domain rather than the generic Gmail account.
Thus, it’s more important than ever to have your own website and professional email addresses to fulfill DomainKeys Identified Mail (DKIM) requirement.
It’s easy to create the email accounts within your cPanel.
You can create these accounts directly in your Setrahost cPanel under “Email Accounts.” It works the same as signing up for a standard Gmail or Yahoo! Mail account.
What is the best way to access my professional author emails?
You can access your email through Webmail via your cPanel or, for better efficiency, use an email client like Mozilla Thunderbird or Microsoft Outlook. Using an email client is the preferred method because it allows you to check multiple accounts at once without having to log in to your hosting dashboard every time.
Does Setrahost offer an automatic WordPress installer?
Yes, Setrahost includes the Softaculous apps installer in the cPanel, which allows for a “one-click” WordPress setup. This tool handles the database creation and file installation automatically, so you can start blogging or designing your site in minutes.
What should I do after installing WordPress?
After the installation is complete, you should pat yourself on the back for handling the technical setup! Your next steps will be handled entirely within the WordPress dashboard, where you can choose a theme (like Divi), install essential plugins, and begin creating your content.
Is it hard to manage a WordPress site on Setrahost?
Not at all. Because Setrahost uses the standard cPanel interface, you have a graphical “dashboard” to manage your server. If you manage to complete the initial setup, you’ll find that daily management—like creating new email accounts or checking site backups—is very user-friendly.